indesign tips for clients
Mia Pinzelik
10 minutes
So your design agency just sent over the final InDesign assets for your fantastic ballroom event at the end of the month. It’s beautiful! The photos are flawless, the type is spectacular, and the colors are spot on. But wait, there’s been a last minute change to the venue location! You send a request back asking for a quick change, but, of course, it’s anything but quick and it’s going to cost extra. You would change it yourself but InDesign is one beast of a program and you have no idea where to even start. Well, your go-to guide to InDesign is here! Instead of focusing on the program from the designers point of view, we are breaking it down for the everyday user who may not be familiar with the program. Keep reading for quick InDesign tips on how to adjust type, imagery, and much more.
Document setup
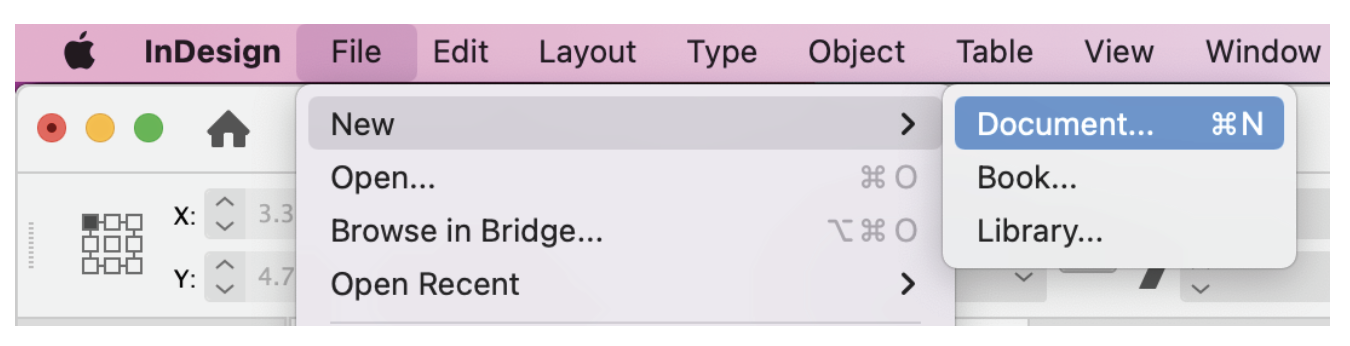
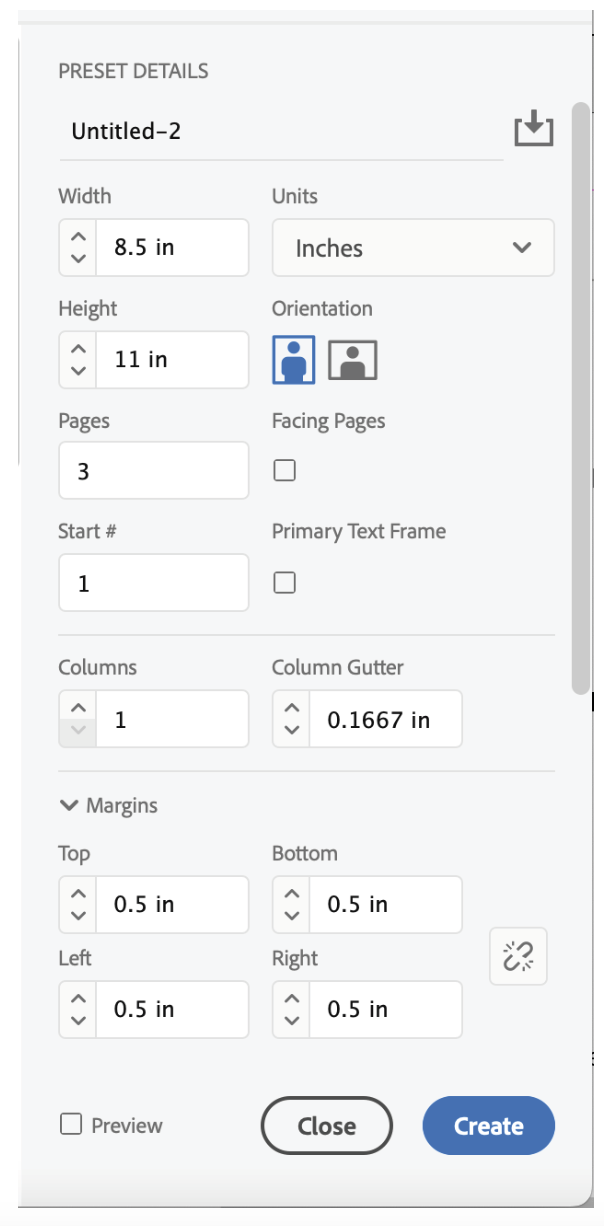
1. Create document
To create a new document, go to File > New > Document. Here you can adjust the size, units, and margins for your document. Once these are to your liking, click Create.
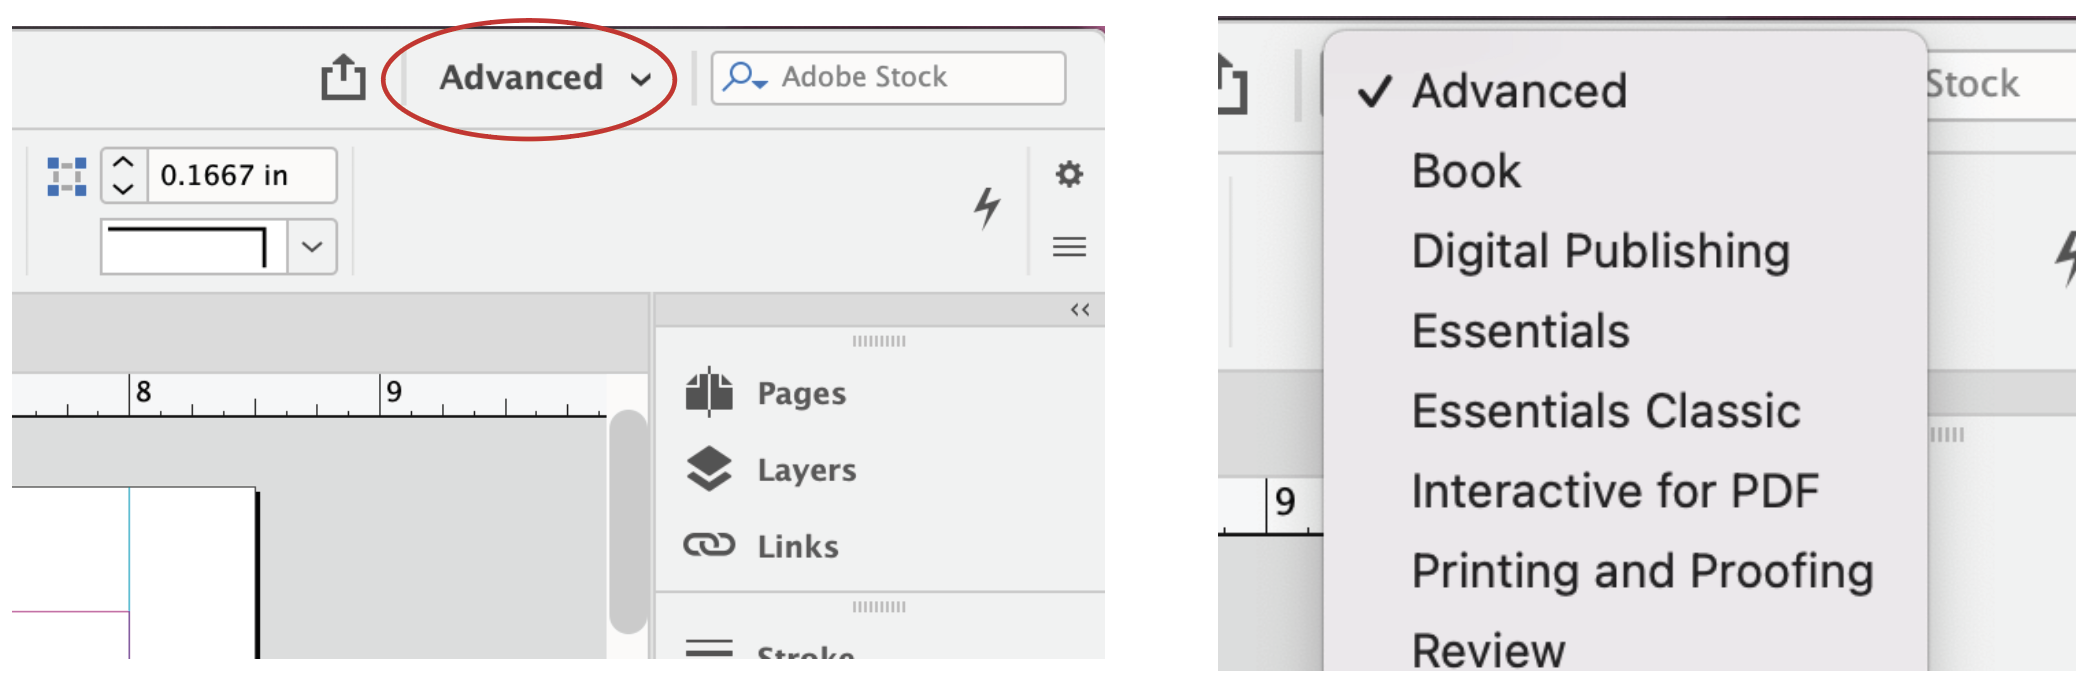
2. Select core menu
You can choose which core menu you start with by clicking the arrow in the top right corner of the application. The core menu is what windows and tools will be in the right bar by default. For most purposes, the menus you will most likely want to be using are Printing and Proofing and Advanced.
Tool Bar
The tool bar on the left side of the window holds the tools you will be using, similar to a tool box.
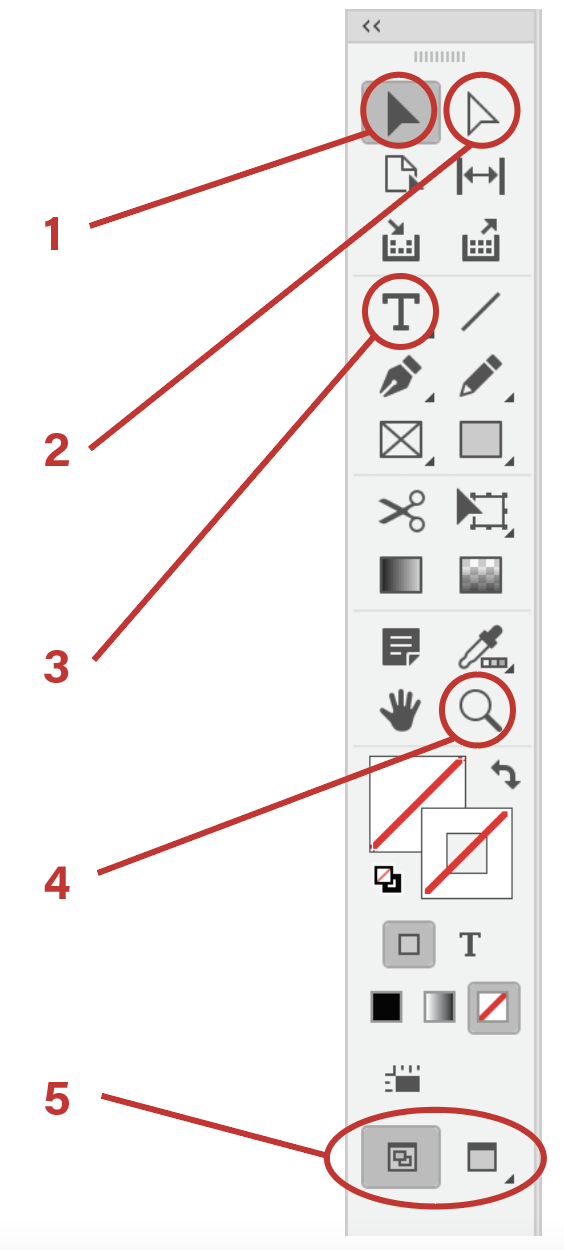
1. Selection Tool
The tool you will be using the most is the selection tool. Use it to select and move items on your document
2. Direct selection tool
The direct selection tool allows you to select items inside of boxes such as images. Use this tool to adjust the size and placement of an item inside a box.
3. Type Tool
Use the type tool to create text boxes and change text. Double click a text box to access this tool.
4. Magnify Glass
Use the magnify glass to zoom in on the document. Click and drag to zoom in and zoom out.
5. Preview Mode
At the bottom of the tool bar, you can toggle between normal and preview mode. Preview mode allows you to view the document as it will look printed.
Keyboard Shortcuts
1. Fit Page in Window
MAC: Command + 0
PC: Control + 0
2. Force line break
Shift + Return
3. Place
Select box you’d like to place an item in
MAC: Command + D
PC: Control + D
4. Group
Select multiple items you’d like to group together
MAC: Command + G
PC: Command + G
5. Undo
MAC: Command + Z
PC: Command + Z
6. Duplicate Item
Option + click + drag
Cmd/Ctrl + C & Cmd/Ctrl + V
Windows
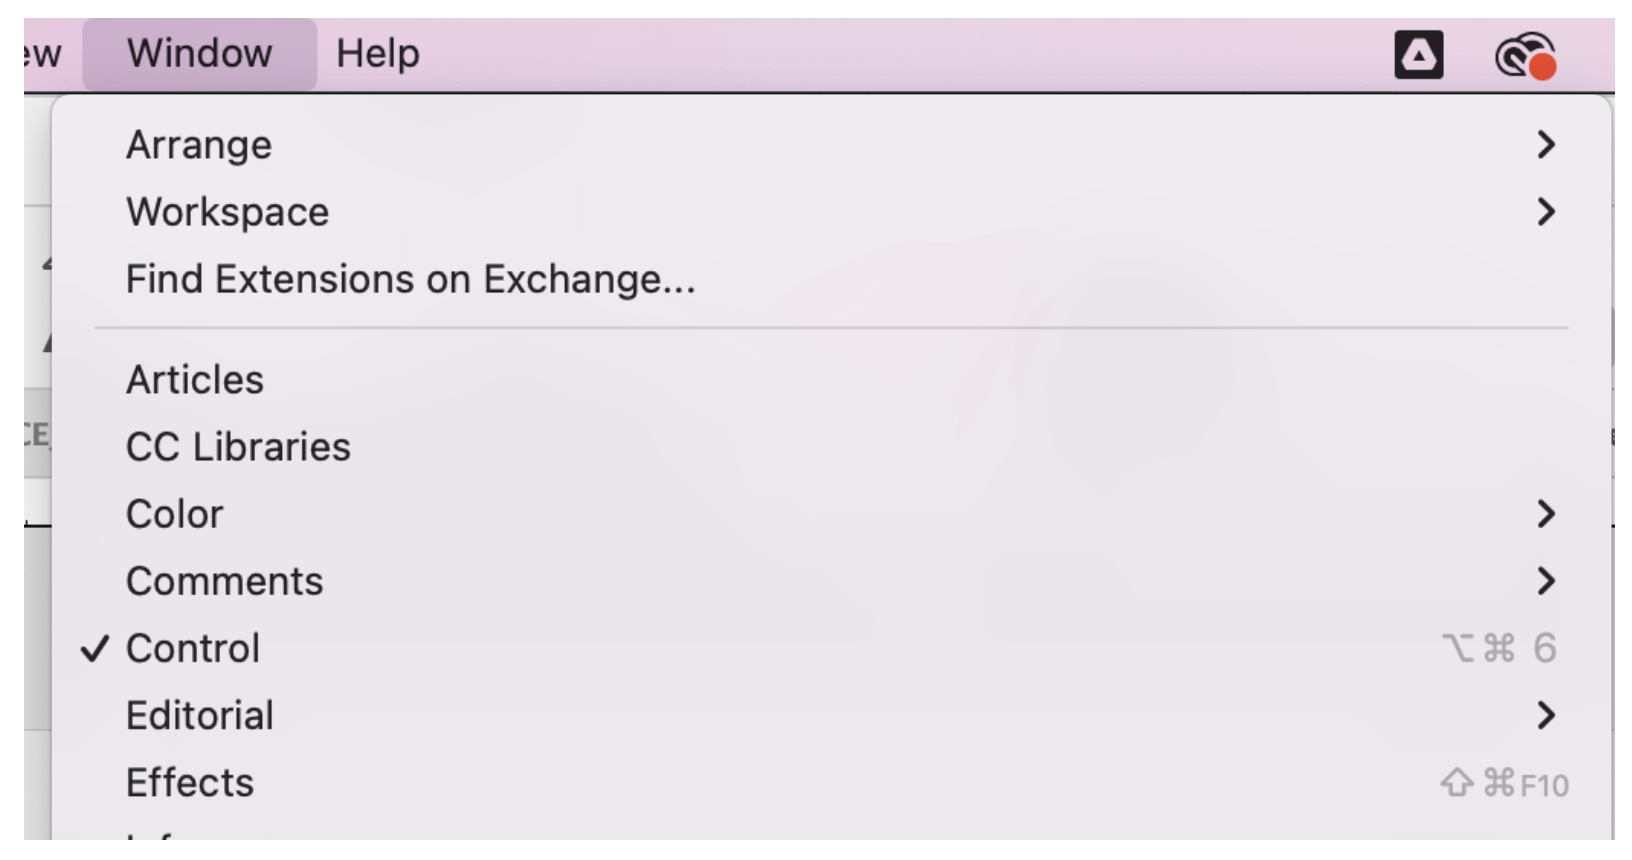
You can load windows by going to the Window tab, drag and organize them on the right bar on the application
Character Window
Use this window to change type size, spacing, font, and font properties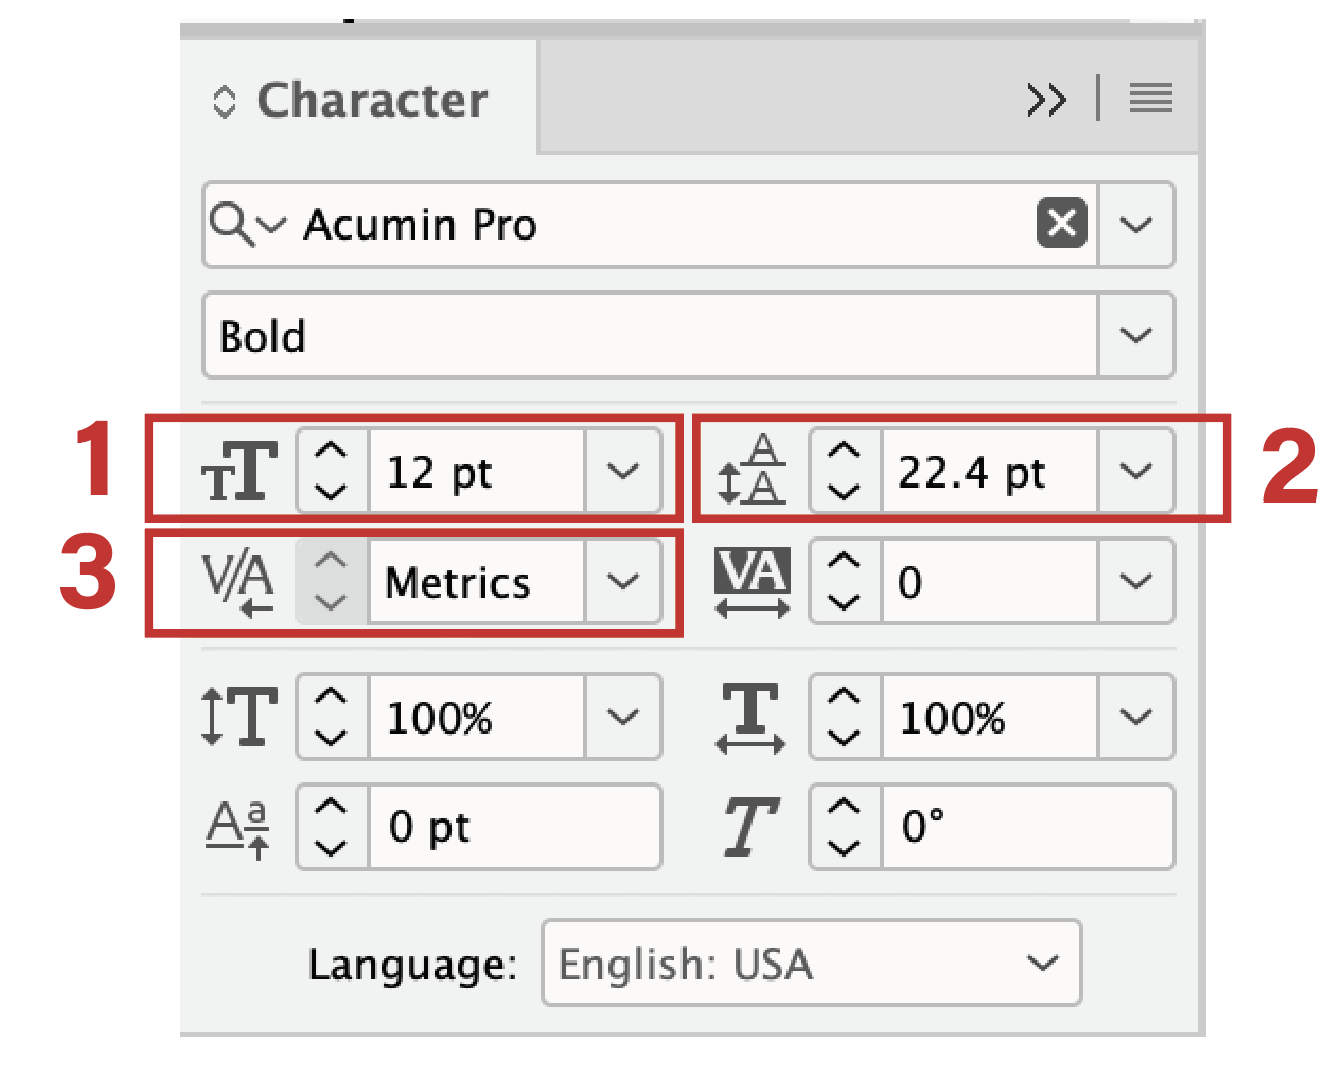
1. Font size – Adjust type point size
2. Leading – Adjust spacing between lines of type
3. Kerning – Adjust spacing between letters, set to optical for best results
Lorem ipsum dolor sit amet, consectetur adipiscing elit. Cras tempor augue facilisis ipsum dignissim, nec blandit libero elementum. Aliquam a est vel sem venenatis blandit. Vestibulum pharetra eleifend iaculis. Nullam lectus eros, ornare a faucibus sit amet, molestie id augue. Pellentesque purus justo, imperdiet sit amet ex tincidunt, consequat bibendum metus. Nunc scelerisque tempor maximus. Praesent finibus, libero non laoreet accumsan, massa sem pulvinar dolor, at sodales erat ipsum fermentum tellus. Pellentesque mattis in felis et finibus. Cras placerat mattis tortor, id laoreet sapien varius quis.
Paragraph Window
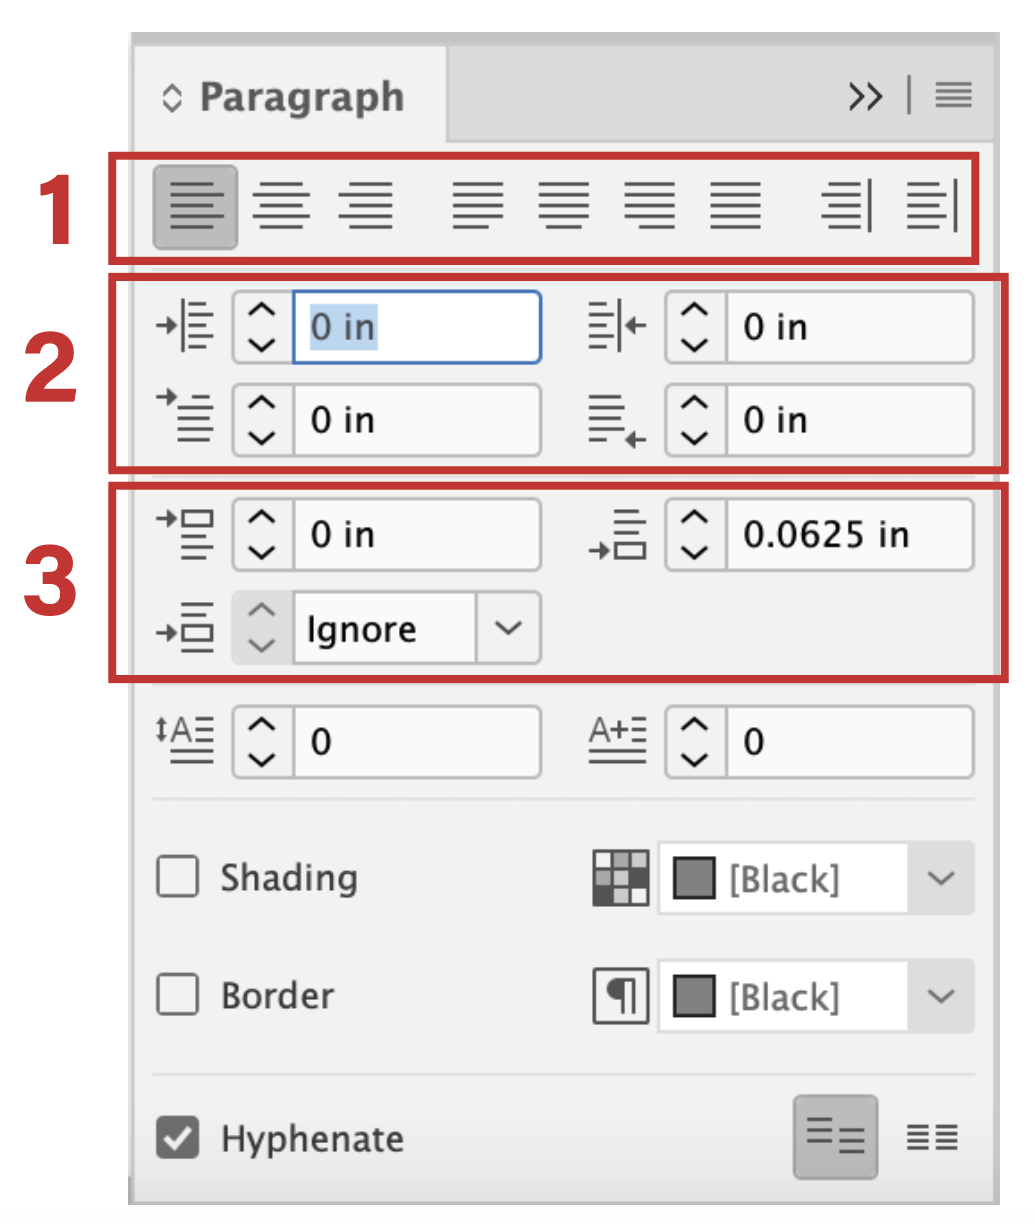
Use this window to adjust spacing and alignment for paragraphs
1. Alignment – change paragraph alignment
2. Indent – Adjust left and right indent of an entire paragraph or first and last line
3. Space – add a space before or after a paragraph
Lorem ipsum dolor sit amet, consectetur adipiscing elit. Cras tempor augue facilisis ipsum dignissim, nec blandit libero elementum. Aliquam a est vel sem venenatis blandit. Vestibulum pharetra eleifend iaculis. Nullam lectus eros, ornare a faucibus sit amet, molestie id augue. Pellentesque purus justo, imperdiet sit amet ex tincidunt, consequat bibendum metus. Nunc scelerisque tempor maximus. Praesent finibus, libero non laoreet accumsan, massa sem pulvinar
dolor, at sodales erat ipsum fermentum tellus. Pellentesque mattis in felis et finibus. Cras placerat mattis tortor, id laoreet sapien varius quis.
Swatch Window
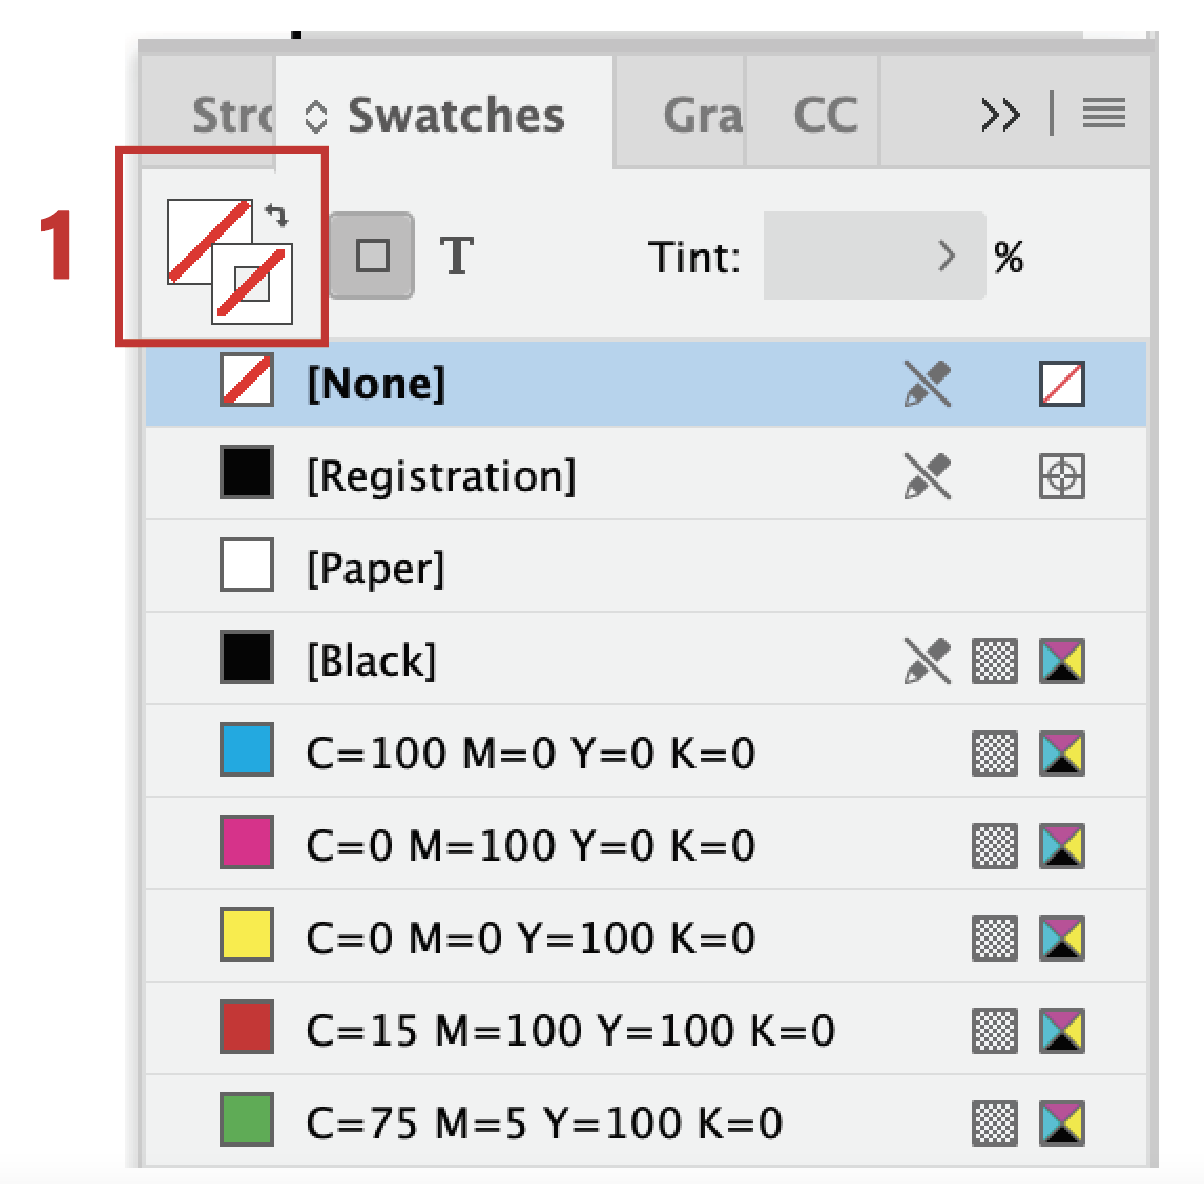
Use this window to change the color of type, boxes, objects, etc.
1. Stroke/Fill – toggle between coloring the stroke or the fill of an object/type.
Lorem ipsum dolor sit amet, consectetur adipiscing elit. Cras tempor augue facilisis ipsum dignissim, nec blandit libero elementum. Aliquam a est vel sem venenatis blandit. Vestibulum pharetra eleifend iaculis. Nullam lectus eros, ornare a faucibus sit amet, molestie id augue. Pellentesque purus justo, imperdiet sit amet ex tincidunt, consequat bibendum metus. Nunc scelerisque tempor maximus. Praesent finibus, libero non laoreet accumsan, massa sem pulvinar dolor, at sodales erat ipsum fermentum tellus. Pellentesque mattis in felis et finibus. Cras placerat mattis tortor, id laoreet sapien varius quis.
Pages Window
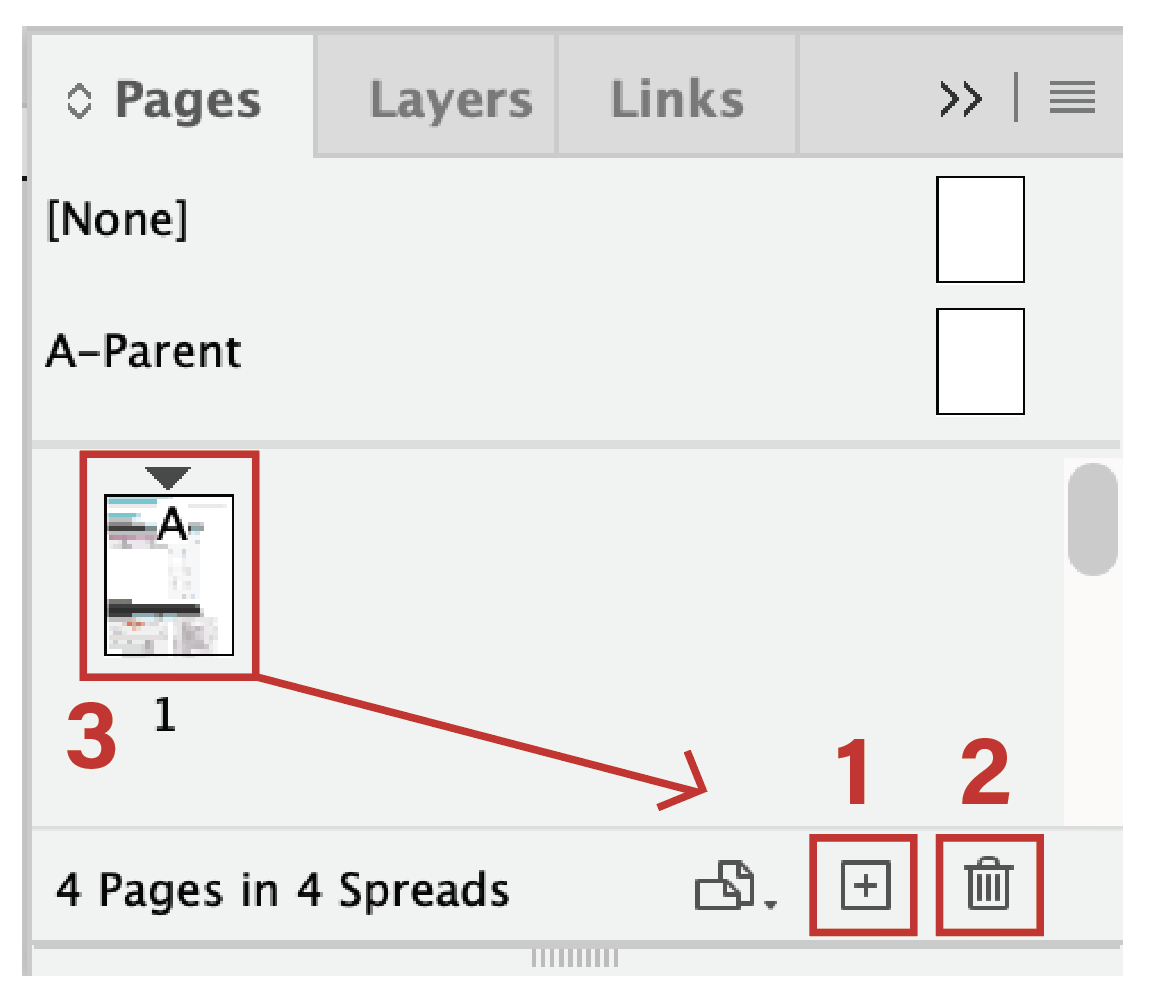
Use this window to view the document’s pages, add pages, and duplicate spreads
1. Create new page
2. Delete page
3. Duplicate spread – click and drag the spread you would like to duplicate to the Create new page bottom
Lorem ipsum dolor sit amet, consectetur adipiscing elit. Cras tempor augue facilisis ipsum dignissim, nec blandit libero elementum. Aliquam a est vel sem venenatis blandit. Vestibulum pharetra eleifend iaculis. Nullam lectus eros, ornare a faucibus sit amet, molestie id augue. Pellentesque purus justo, imperdiet sit amet ex tincidunt, consequat bibendum metus. Nunc scelerisque tempor maximus. Praesent finibus, libero non laoreet accumsan, massa sem pulvinar dolor, at sodales erat ipsum fermentum tellus. Pellentesque mattis in felis et finibus. Cras placerat mattis tortor, id laoreet sapien varius quis.
Layers Window

Layers will often be organized by logo, type, imagery and any other type of content appropriate to your project.
1. Eyeball icon – toggle on/off visibility of a specific layer
2. Lock icon – lock/unlock a specific layer
Lorem ipsum dolor sit amet, consectetur adipiscing elit. Cras tempor augue facilisis ipsum dignissim, nec blandit libero elementum. Aliquam a est vel sem venenatis blandit. Vestibulum pharetra eleifend iaculis. Nullam lectus eros, ornare a faucibus sit amet, molestie id augue. Pellentesque purus justo, imperdiet sit amet ex tincidunt, consequat bibendum metus. Nunc scelerisque tempor maximus. Praesent finibus, libero non laoreet accumsan, massa sem pulvinar dolor, at sodales erat ipsum fermentum tellus. Pellentesque mattis in felis et finibus. Cras placerat mattis tortor, id laoreet sapien varius quis.
Links Window
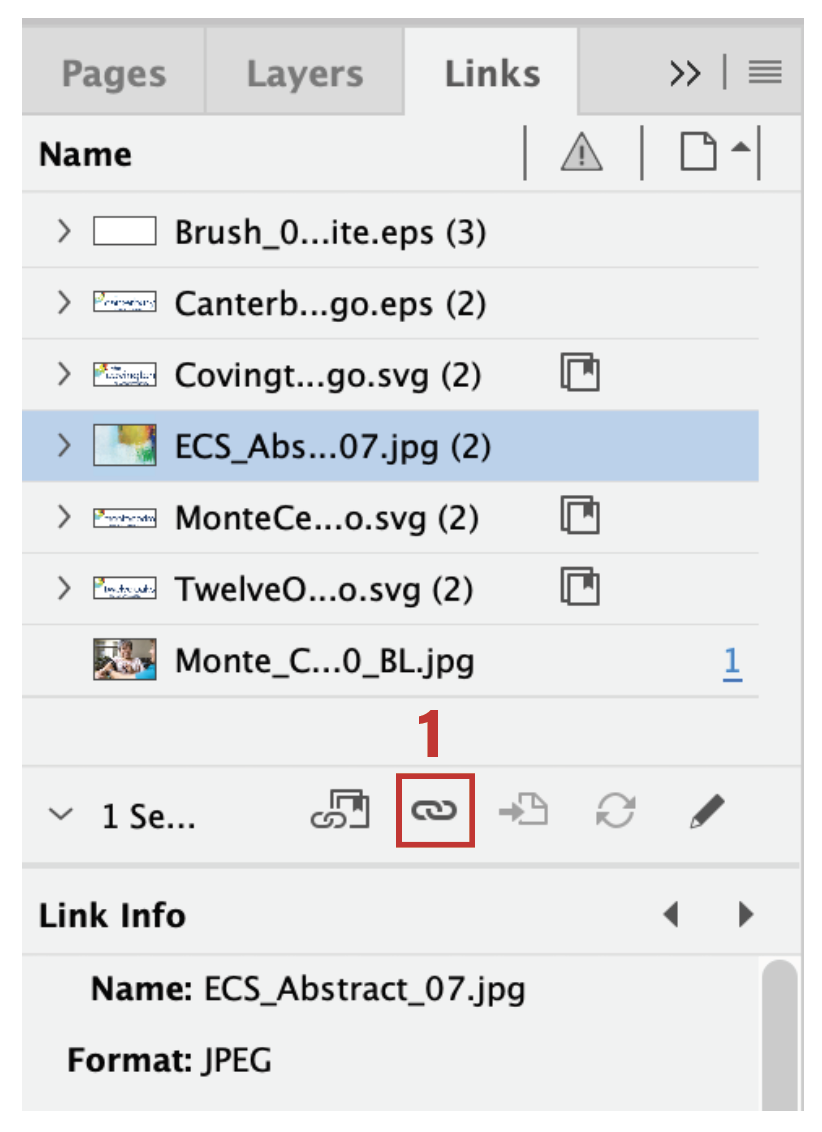
All images, logos, and other items placed in the document are links. You can adjust and view link info in the link window. Click on a link to view info.
1. Relink – use this to relink an item to a different item onyour computer. Placement, dimensions, andorientation will remain the same.
Lorem ipsum dolor sit amet, consectetur adipiscing elit. Cras tempor augue facilisis ipsum dignissim, nec blandit libero elementum. Aliquam a est vel sem venenatis blandit. Vestibulum pharetra eleifend iaculis. Nullam lectus eros, ornare a faucibus sit amet, molestie id augue. Pellentesque purus justo, imperdiet sit amet ex tincidunt, consequat bibendum metus. Nunc scelerisque tempor maximus. Praesent finibus, libero non laoreet accumsan, massa sem pulvinar dolor, at sodales erat ipsum fermentum tellus. Pellentesque mattis in felis et finibus. Cras placerat mattis tortor, id laoreet sapien varius quis.
Images
After placing an image in a box, you can adjust the box and the image separately.
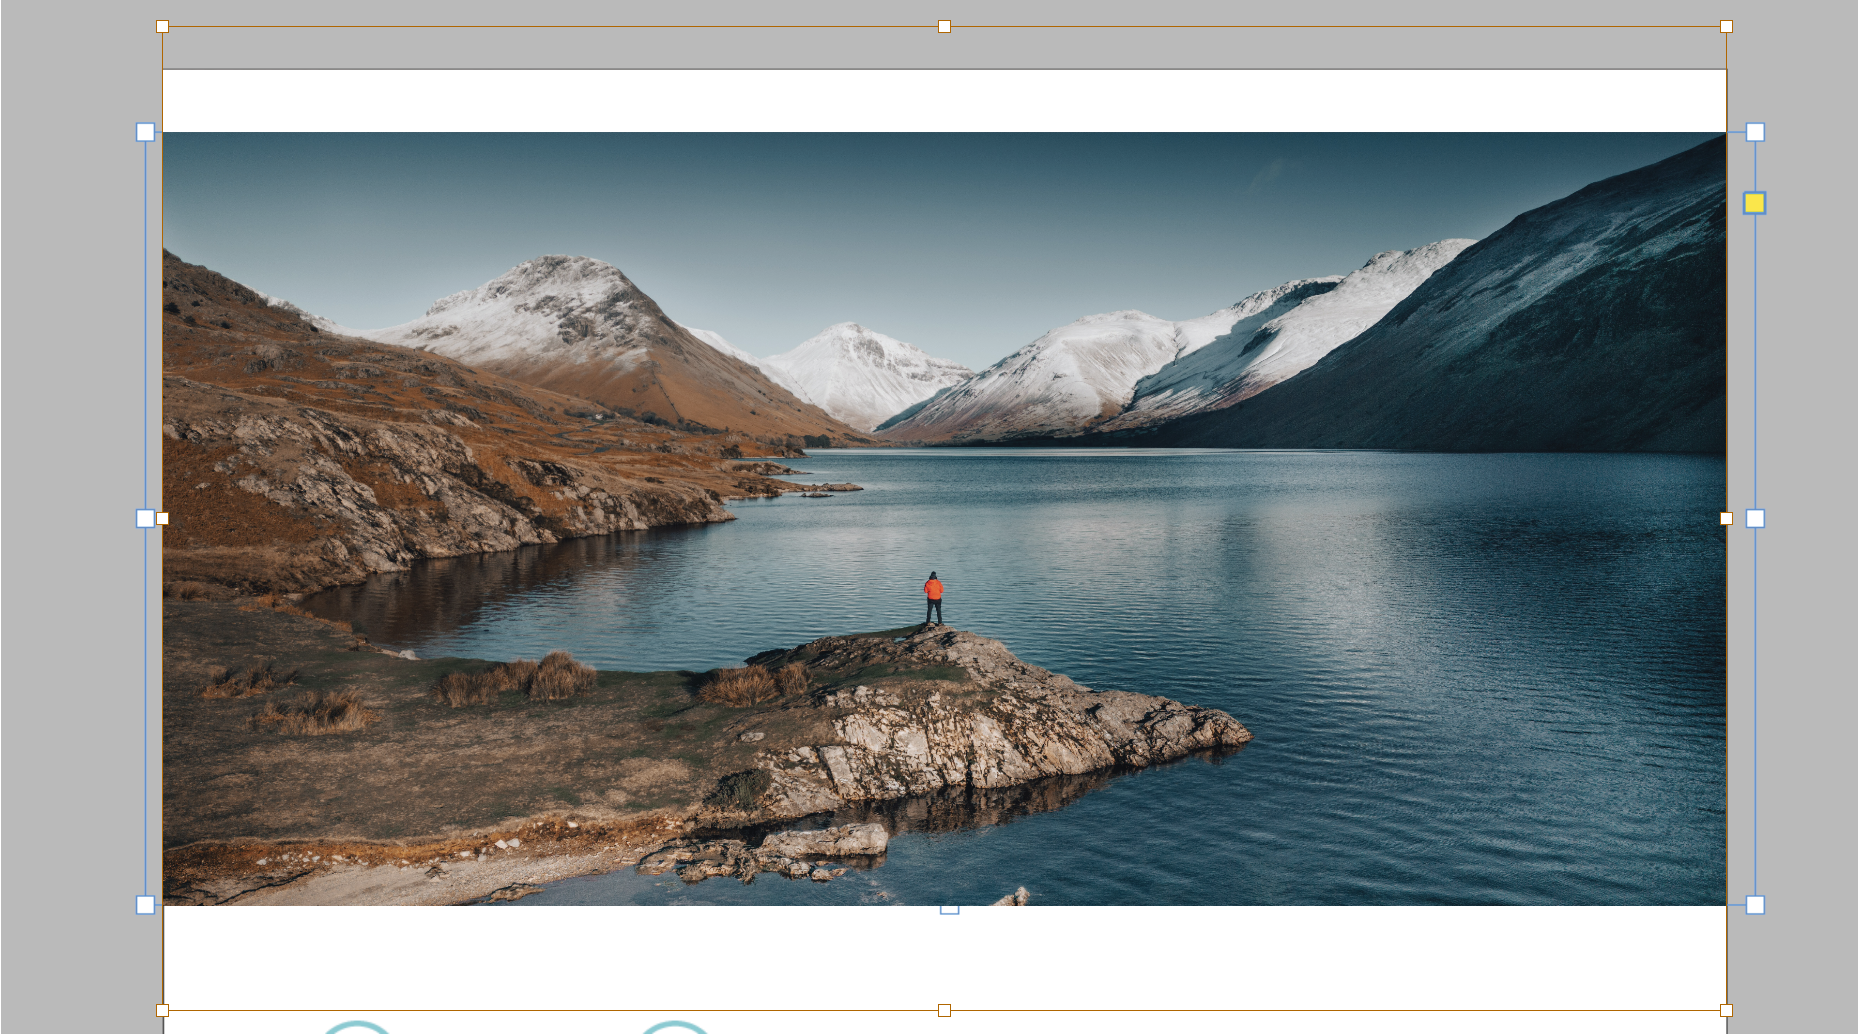
1. Cropping an image
Use the selection tool to change the size of the bounding box for an image by dragging the toggles on the corners and edges of the box. The image size, placement, and dimension will not be changed.
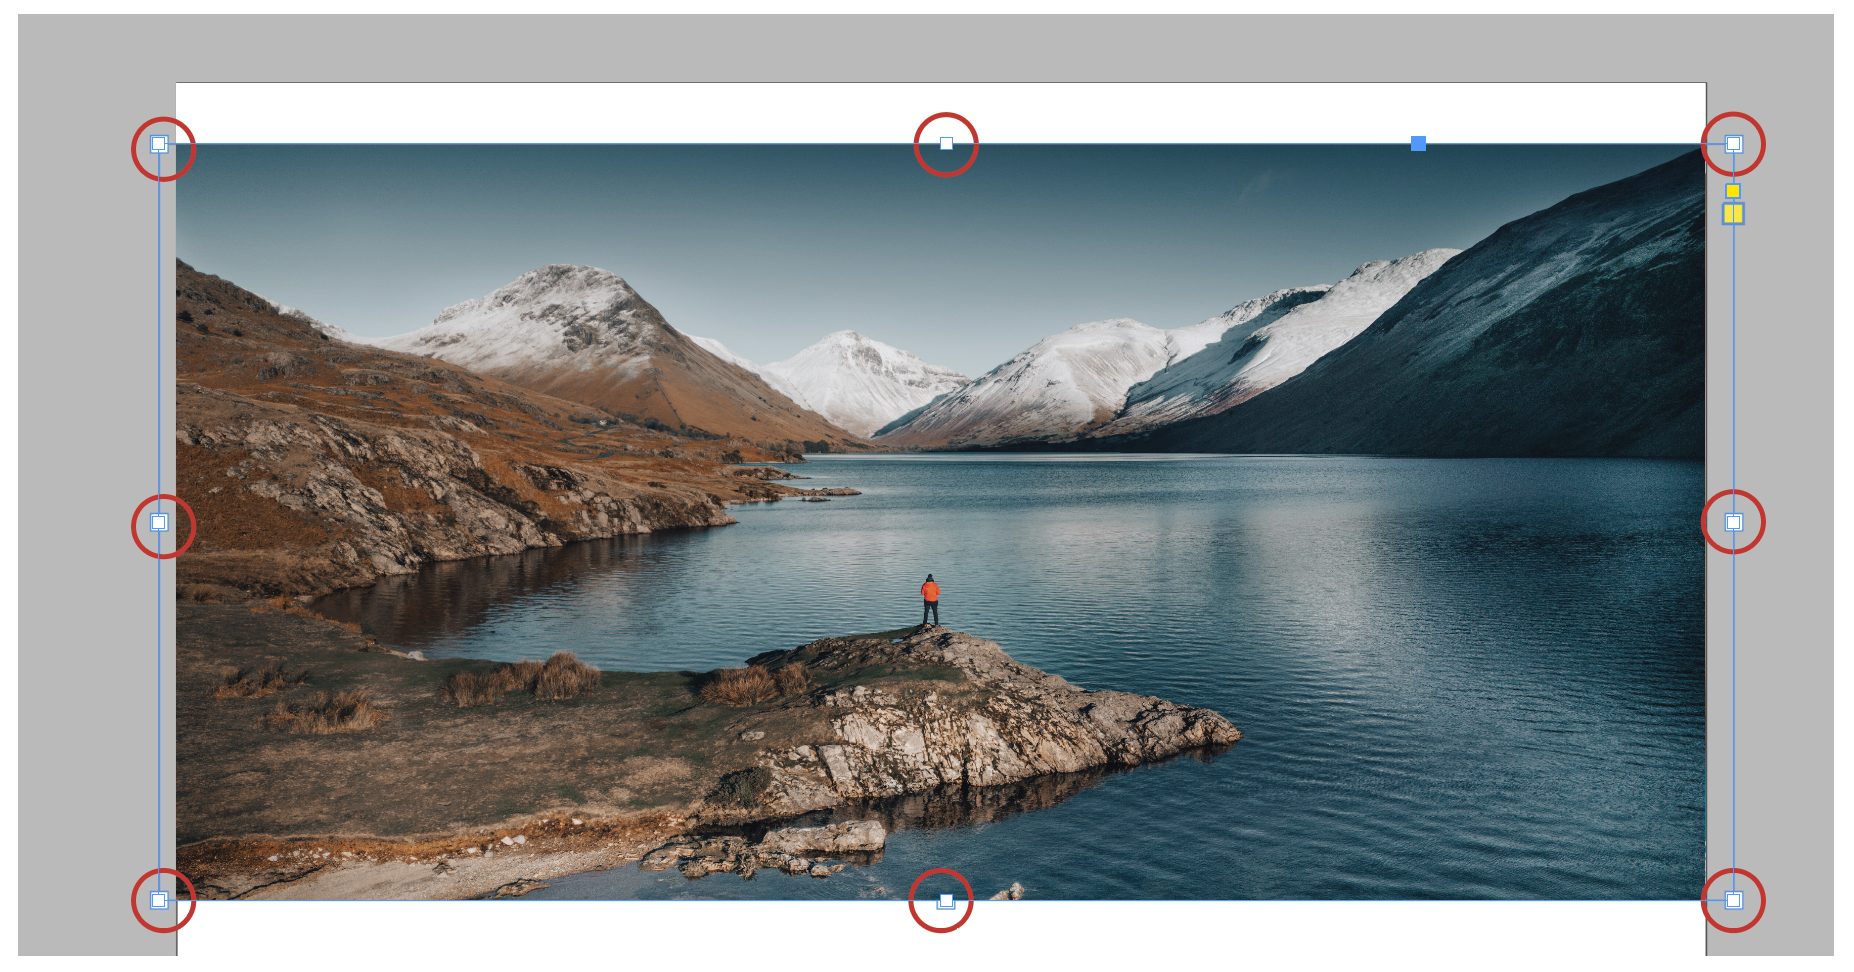
2. Move and scale image
Click in a box with the direct selection tool to edit the image. A hand icon over an image means you will be moving an image around in a bounding box. Drag the toggles on the edge and corner of an image to resize the image. Hold shift while dragging to resize the image proportionally. You can also go to Object > Fitting for options for fitting images in boxes
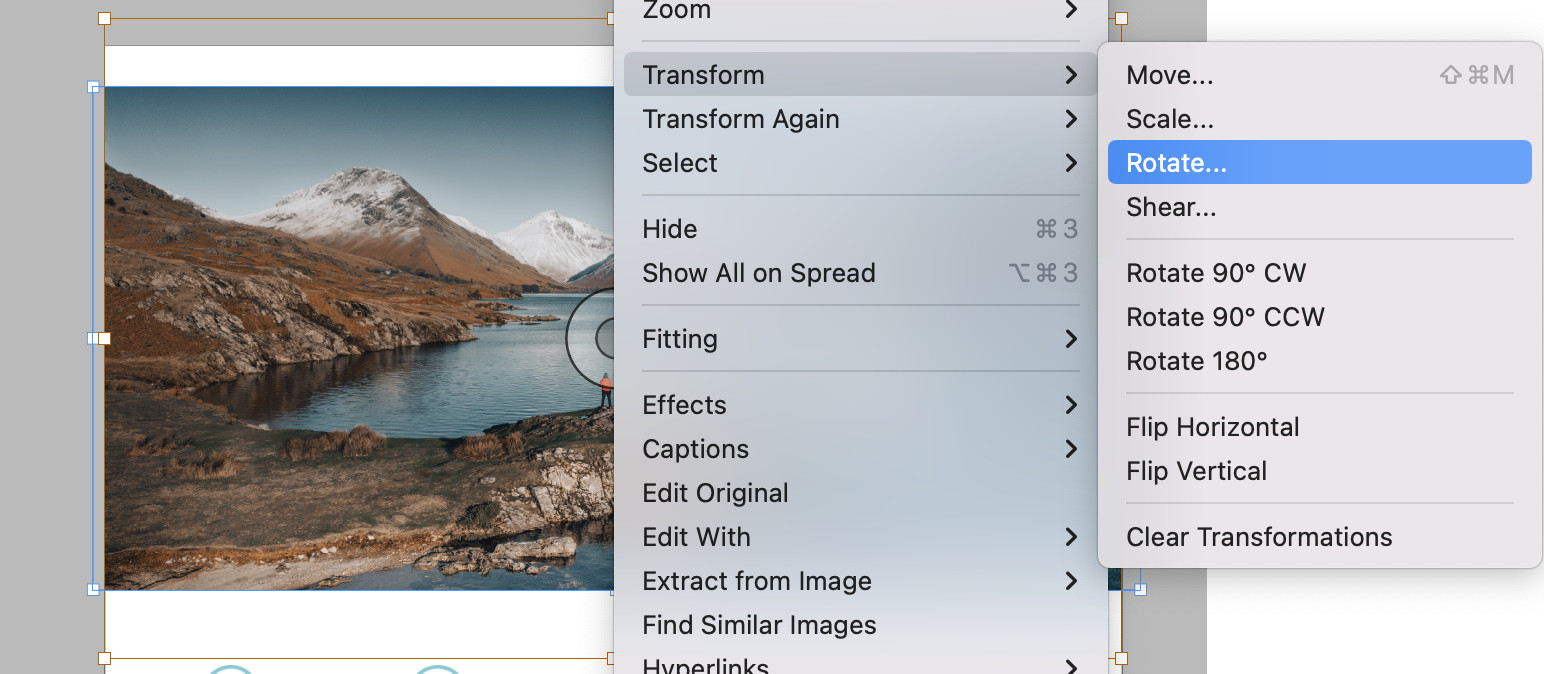
3. Flip and Rotate image
Right click on an image with the direct selection tool and go to Transform > Rotate/Flip Vertically/Flip Horizontally
Tables
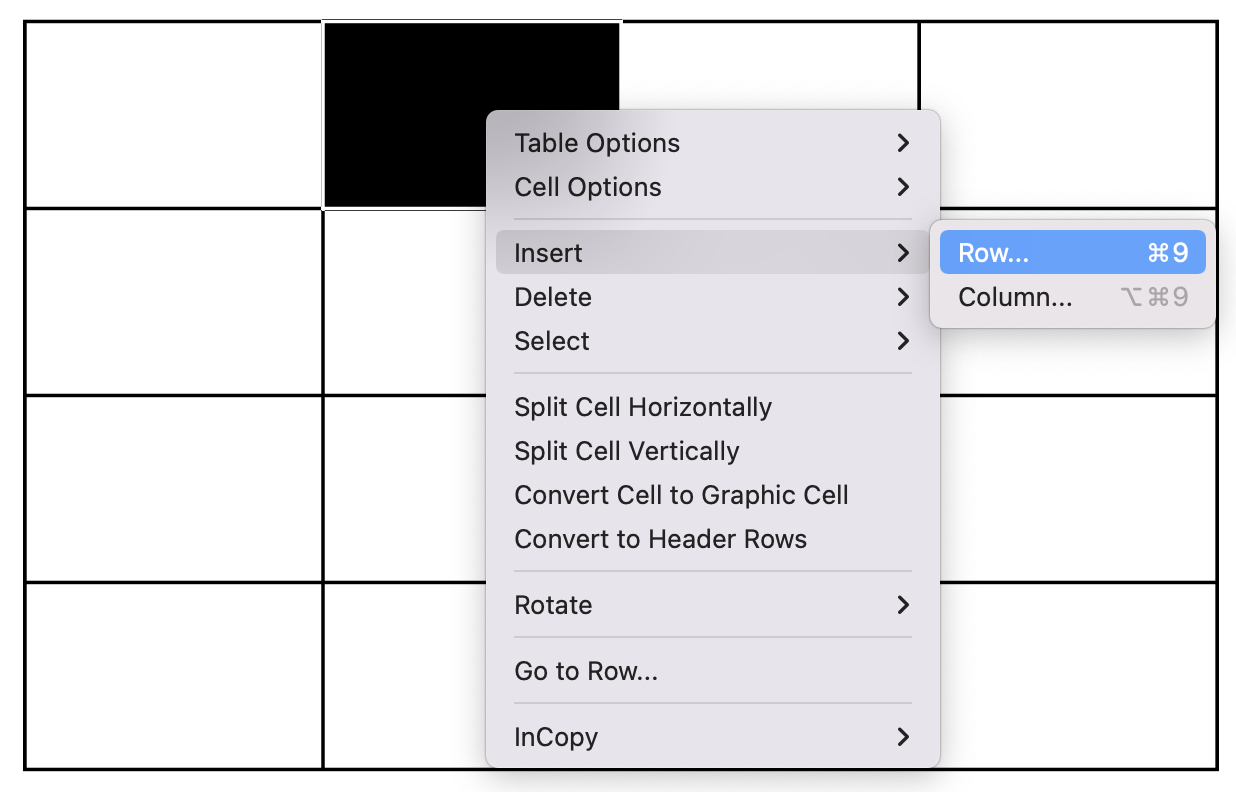
Tables function similarly to how they would in Excel. Double click a table to change content. You can select multiple cells at a time to make changes to all of them at once. You can add rows and columns by selecting a row/column then Right Click > Insert > Row/Column.
Well there ya go! See? InDesign isn’t TOO scary once you know the basics. Good luck on those last minute changes!
More
insights
Lorem ipsum dolor sit amet, consetetur sadipscing elitr, sed diam nonumy eirmod tempor.
©2025 300FeetOut All Rights Reserved | Privacy Policy