
dev corner: tips and tricks for building admin panels (part III)
June 6, 2019
written by
Chantel Keith
In our previous post of this series, we provided a few tips and tricks to improve the editor’s user experience by cleaning up & organizing the overall admin interface. In our final post of this series, we’ll be providing additional recommendations for making the content editing experience more enjoyable while using the infamous WYSIWYG editor.
part 3. Keep the WYSIWYG simple.
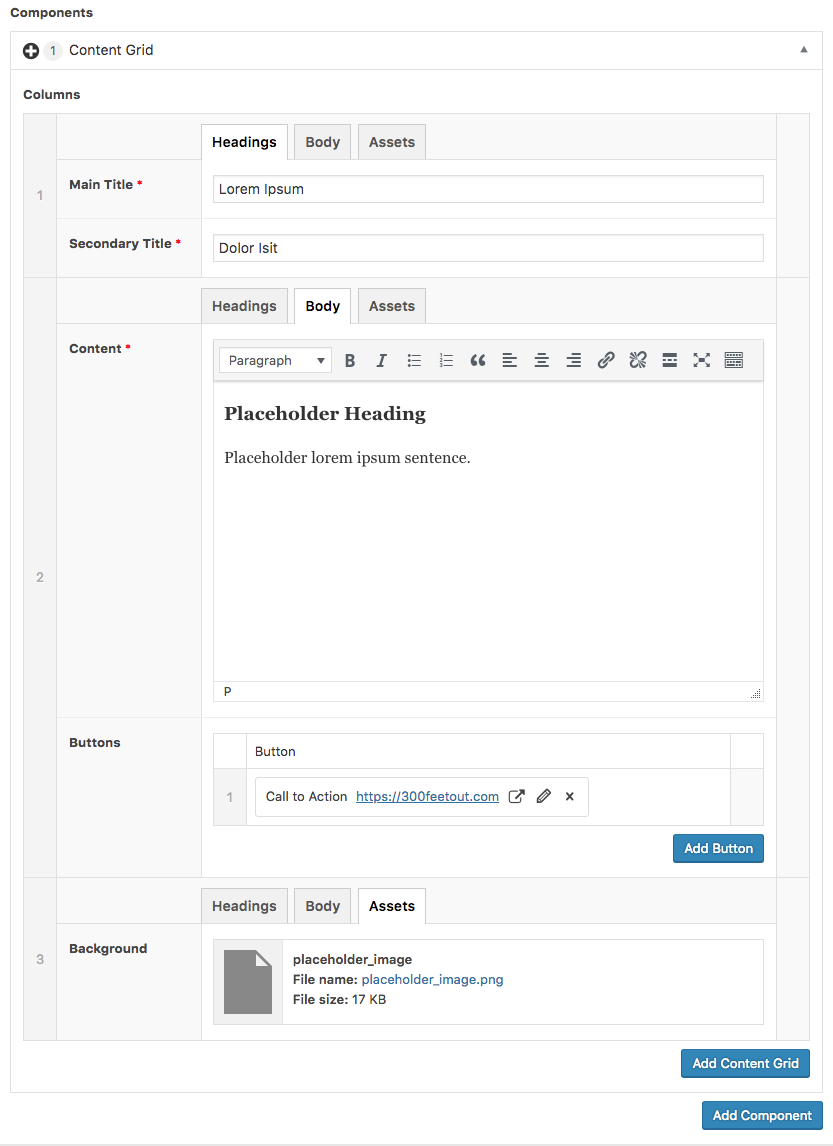
Often times, we find that it isn’t immediately obvious to editors which WYSIWYG tools to use. A huge variety of options that may or may not be used and new nomenclature (is that a post or a page?) means that the back end isn’t usually intuitive when wanting to format the front end presentation of a webpage. To that end, it’s important to include placeholders and remove extraneous tools or buttons that are not being utilized to keep the admin panel clean and simple.
Set a good example.
Adding default text into WYSIWYG fields can help map out the type of heading, paragraph or link formatting that is often being used. We were delighted to learn that you can even add HTML elements into the default value field as placeholder. While most of your users will clone pages, this isn’t always possible. So this becomes beneficial for users who want to add a new component to the content of an existing page when they can’t use a page cloning plugin. It also keeps your brand intact by giving users the guidelines set by the design team.

Keep it short.
Be sure to remove the Media upload button if the front end of a component does not accommodate images or other assets. This also includes any “Add Form” or extraneous buttons that may be added by other WordPress plugins. Limiting the WYSIWYG tools to either full or basic based on the type of content the container can accept will help to narrow the number of formatting options for editors. For example, if a heading is not required then basic will most likely suffice.
Go the extra mile.
Fortunately, WordPress’ WYSIWYG editor can be quite flexible by utilizing the built-in Formats tab. Although it will require a bit of extra time configuring each formatting option, your editors and designers will thank you. By creating custom formats, you’ll be able to provide formatting options for editors to control various text and image styling to allow more formatting to be done in the WYSIWYG editor itself while also maintaining consistency in design between each of the pages on your site. For example, we often create formats for lead paragraph text to bump up the font size a few pixels, a format for responsive images to span full width, or a format to change the text color to a commonly used brand color. This allows editors with little HTML or CSS knowledge to be able to apply reusable classes to elements without writing any code or breaking brand guidelines.
In sum, the admin panel is similar to the front end experience in that we want to streamline the overall user experience. Offering too many choices increases the time it takes to make a decision, so avoid it. Also try to provide as many hints as you can to speed the editing process up. You’ll end up saving yourself and your client valuable time not only spent in training but also in simple, general use of the editor.